
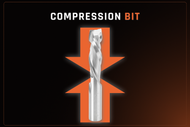
KEY TAKEAWAYS
- Opposing Flute Geometry: Compression bits pair an upcut spiral tip with a downcut spiral body, directing cutting forces inward toward the center core to eliminate tear-out on both faces.
- Halved Cycle Times: Routing nested panels in one full-depth pass reduces machine run times by 40% to 50% compared to traditional two-pass scoring routines.
- The Upcut Length Rule: To protect the top surface, your initial cut depth must always exceed the length of the tool's upcut section.
- Mortise Compression Versatility: Mortise compression bits feature an ultra-short upcut tip (typically 1/8" to 3/16"), allowing clean shallow dadoes, pockets, and thin-panel routing.
- Ramping Protects the Edge: Smoothly ramping into cuts rather than plunging straight down eliminates surface blowout and prevents thermal shock at the carbide tip.
If you run a CNC router in a cabinet shop or custom millwork facility, edge tear-out is a familiar headache. You load a sheet of pre-finished maple plywood or double-sided melamine, hit cycle start, and watch the top or bottom veneer chip out along the toolpath.
For years, the standard workaround on nested-base machines was simple but slow: run two passes. First, you ran a shallow scoring pass with a downcut bit to protect the delicate top veneer. Next, you ran a second pass with an upcut bit to clear chips and protect the bottom face.
While that stopped chipping, it doubled cycle times, burned through spindle hours, and wore out cutters twice as fast.
Compression spiral router bits solve this problem directly. By combining two opposing cutting geometries onto a single solid carbide tool, a compression bit cuts full-depth in a single pass while leaving crisp, chip-free edges on both surfaces. Here is how compression geometry works, why it eliminates the two-pass penalty, and how to dial it in on your CNC.
The Anatomy of a Compression Bit
To see why compression tooling works so well, look at how standard spiral flutes behave under load:
- Upcut spirals pull chips upward toward the collet. This lifts chips out of deep cuts efficiently and leaves a sharp, clean finish on the bottom surface of the sheet. But as the cutting edge exits the top face, upward shear forces lift fibers and chip brittle laminates.
- Downcut spirals push chips downward toward the spoilboard. This downward force holds thin sheets flat and keeps the top face crisp. However, as the bit exits the bottom face, downward pressure blows out the veneer, while packed chips in the kerf trap heat.
A compression bit combines both flutes on a single solid carbide cutter:
- The tip features an upcut helix.
- The upper body features a downcut helix.
When running at full depth, these opposing shear angles act like a pair of high-speed scissors. The lower flutes shear upward on the bottom face, while the upper flutes push downward on the top face. Cutting forces compress inward toward the center core of the sheet. The result is a clean, splinter-free edge on both faces in one continuous pass.
The Two-Pass Problem vs. Single-Pass Efficiency
Why does replacing two passes with one matter so much in production? In nested-base manufacturing, seconds per sheet quickly turn into hours per week.
Running a two-pass approach means your machine traverses the perimeter of every nested part twice:
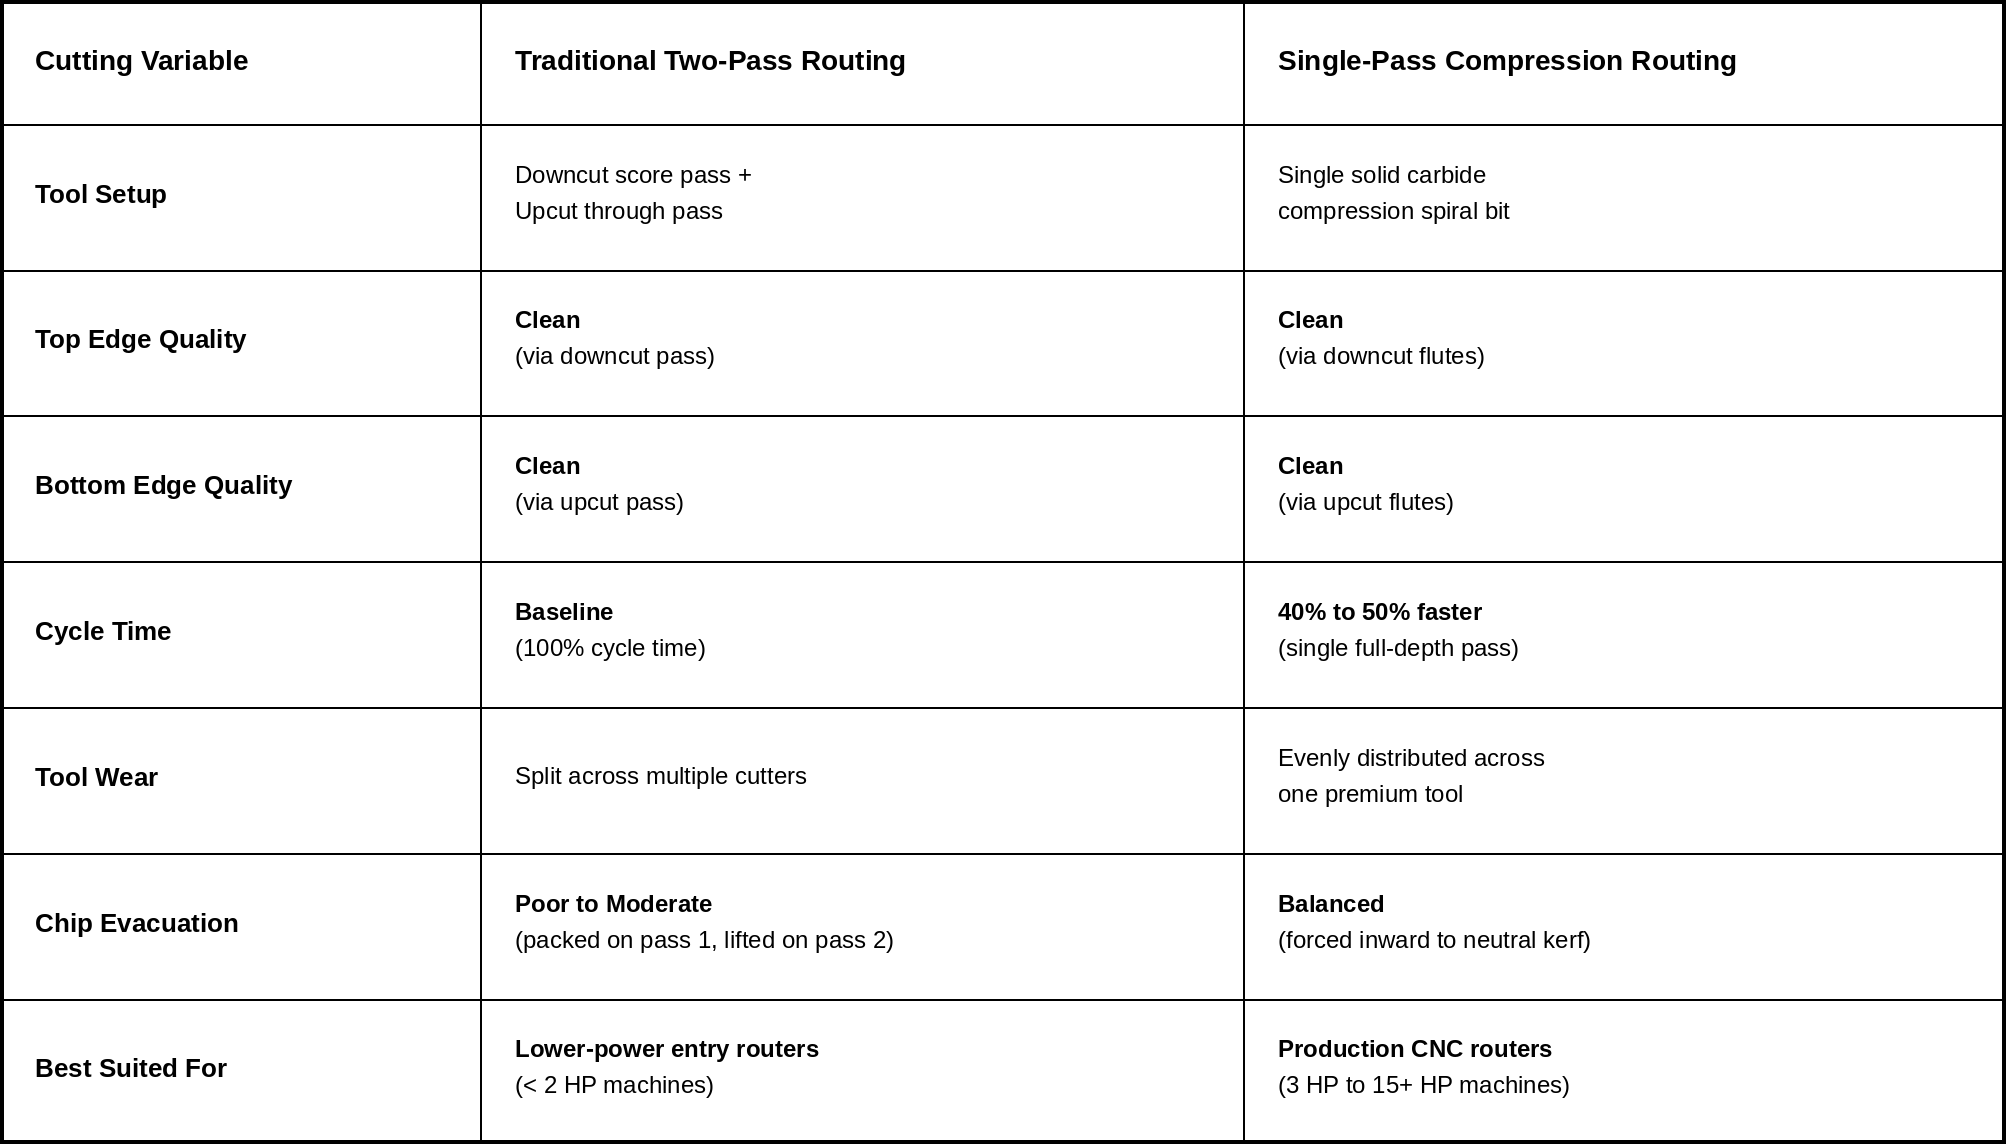
- Doubled Cycle Times: Cutting 25 sheets a day with two passes ties up your router for an entire shift. A single-pass compression bit cuts perimeter routing time nearly in half.
- Spindle and Machine Wear: Spindle bearings, drive gears, and linear rails travel twice as far for the exact same part yield.
- Flawless Edge Banding: Micro-chipping often goes unnoticed until panels reach the edge bander, leading to visible glue lines or loose tape. Compression tooling produces a square, dense core ready for immediate banding.
Strategy Comparison: Two-Pass Routing vs. Single-Pass Compression
The Golden Rule: Mind the Upcut Transition Length
While compression bits excel at single-pass cutting, they have one non-negotiable rule: your cut depth must exceed the upcut length of the tool.
If a bit has a 0.300" upcut tip and you take a shallow pass of only 0.200", only the upcut portion touches the material. The tool will behave like a standard upcut bit, tearing out your top surface.
This is why choosing the right tool geometry matters:
- Standard Compression Bits: Feature an upcut section between 0.250" and 0.350". These are engineered for full-depth perimeter cutouts in 5/8", 3/4", or 1" panels where the tool plunges past the transition zone immediately.
- Mortise Compression Bits: Built with an ultra-short upcut tip (typically 1/8" to 3/16"). Mortise compression bits allow you to cut shallow grooves, dadoes, hinge pockets, and shelf pin holes in 3/4" stock while keeping downcut flutes engaged on the top face. They are also ideal for through-cutting thinner 1/4" and 1/2" panels.
Production Best Practices: Feeds, Speeds, and Ramping
To maximize tool life and cut quality from your compression bits, follow these shop-floor rules:
- Always Ramp into the Cut: Never plunge straight down into dense panels. A straight Z-axis plunge stresses end teeth, concentrates heat at the tip, and blows out the top surface before downcut flutes engage. Use a smooth linear or spiral ramp over 1 to 2 inches so the tool enters while traveling forward.
- Maintain Proper Chip Load: Babying a solid carbide tool burns it out. If your feed rate is too slow for your spindle speed, the cutting edges rub instead of cutting, generating friction that dulls carbide.
- For a 1/2" 2-flute compression bit in 3/4" material, target a chip load of 0.020" to 0.024" per tooth (720 to 860 IPM at 18,000 RPM).
- For a 3/8" tool, target 0.014" to 0.018" per tooth (500 to 650 IPM at 18,000 RPM).
- Verify Vacuum Hold-Down: Because compression bits cut full depth in one pass, adequate vacuum hold-down is critical. Keep your spoilboard surfaced regularly to prevent small nested parts from shifting during final breakthrough.
The Bottom Line for Your Shop
A compression bit is more than an everyday router bit; it is a cycle-time optimization tool. By eliminating redundant scoring passes and tool changes, solid carbide compression tooling frees up spindle capacity on your CNC table and delivers parts that require zero bench sanding.
Whether you run high-speed 3+3 compression spirals for demanding sheet goods or a mortise compression bit for joinery and shallow pockets, matching the right flute geometry to your material keeps your machines cutting and your scrap bin empty.
Have questions about matching compression bit geometry to your specific panel substrates? Contact us today for practical, shop-floor tooling recommendations.